I've read the pages of instructions for doing a trigger job on my Handi Rifle a few times. If you own one, you probably know why. If you don't have one, it's a crisp 6-9lbs.
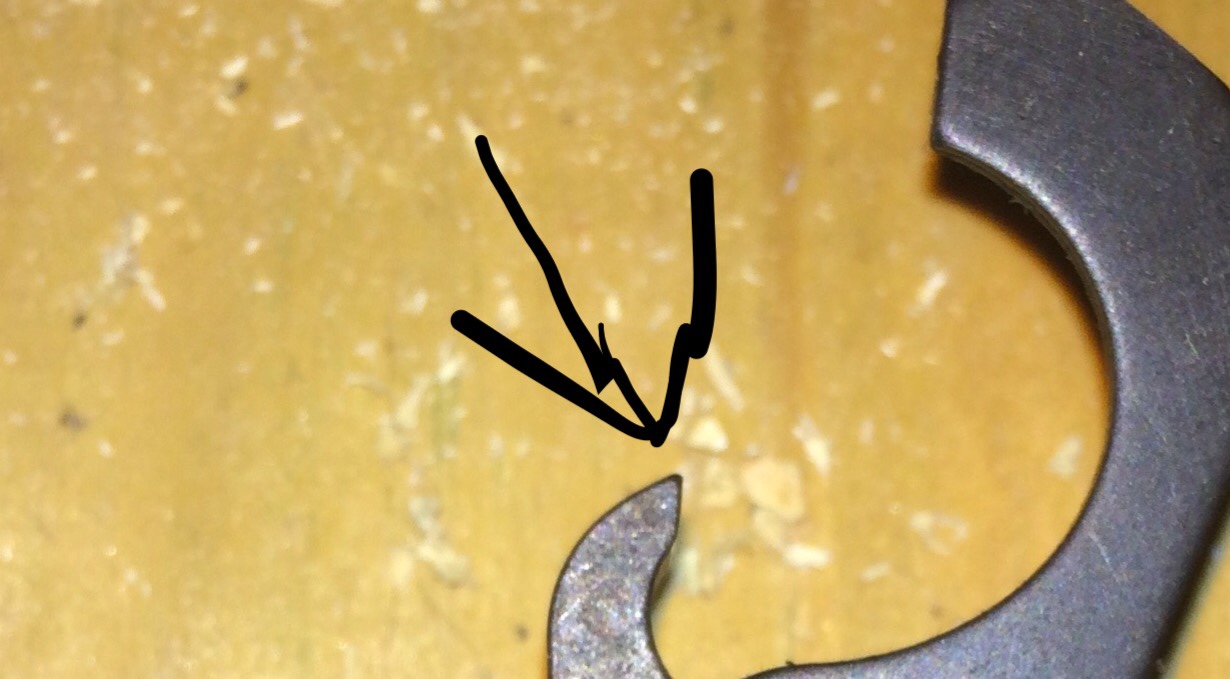
The online written directions are pretty detailed, they are great, but they also make it look like you need to be a practicing gunsmith to tackle it. I finally got bored enough yesterday to go for it and after completing the job I found it wasn't nearly as bad as the 20 pages of PDF made it look. However, it can very easily be taken too far. The contact surfaces a very small and it makes keeping a proper angle that much more important.
Tools needed: Hammer, punches to fit each pin (i use allen wrenches), phillips screwdriver for the fore stock, something that will work as a slave pin for the larger size pins (i cut a piece off the allen wrench I used for a punch), two 2X4 wood blocks, honing stone, dremel and polishing compound, good eyes, whatever else I remember as I go.
Disassembly:
First thing you need to do is remove the forestock and barrel. Pop the barrel off and throw it somewhere. If you want you can remove the butt you can but it's not necessary. Two #2 Philips in the pad and a 9/16" bolt. You'll need an extension to reach it.
Now time to beat the shit out of it. If you have the 300BO AAC version you got it easy. I thoroughly tested the finish and it's tough as hell. If not, take proper precautions and adjust as needed.
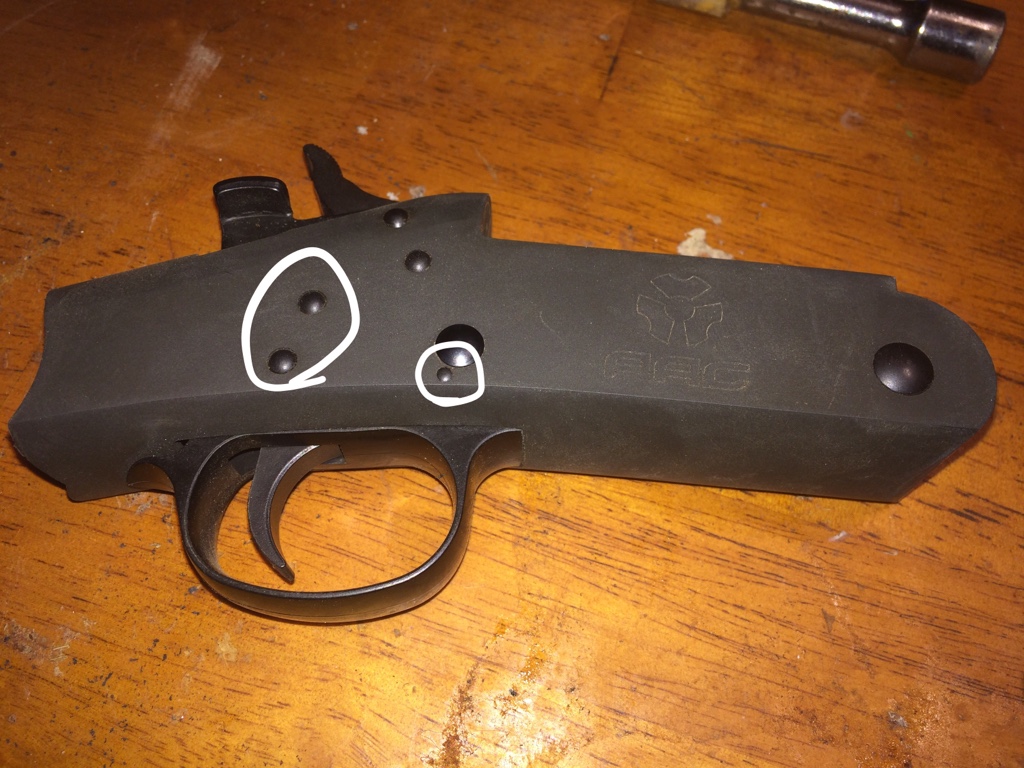
You only need to remove the pins circled in the picture. They are splined on one side so you only want to hit them from the side shown in the picture. My method: Place the receiver on the blocks with them spaced so the pin has clearance to punch down between them. Take the hammer, choose a pin, and whack the **** out of it. I was using my wifes little hammer, if you are using a small sledge just whack the tar out of it. Make sure the 2X4s are spaced close enough to support the area around the pins. They are fairly stubborn. The smooth face hammer left no marring of any kind on the finish. Once each is flush with the receiver you can use a punch without it skipping off the rounded pin. For now, just get them started, don't remove them completely.
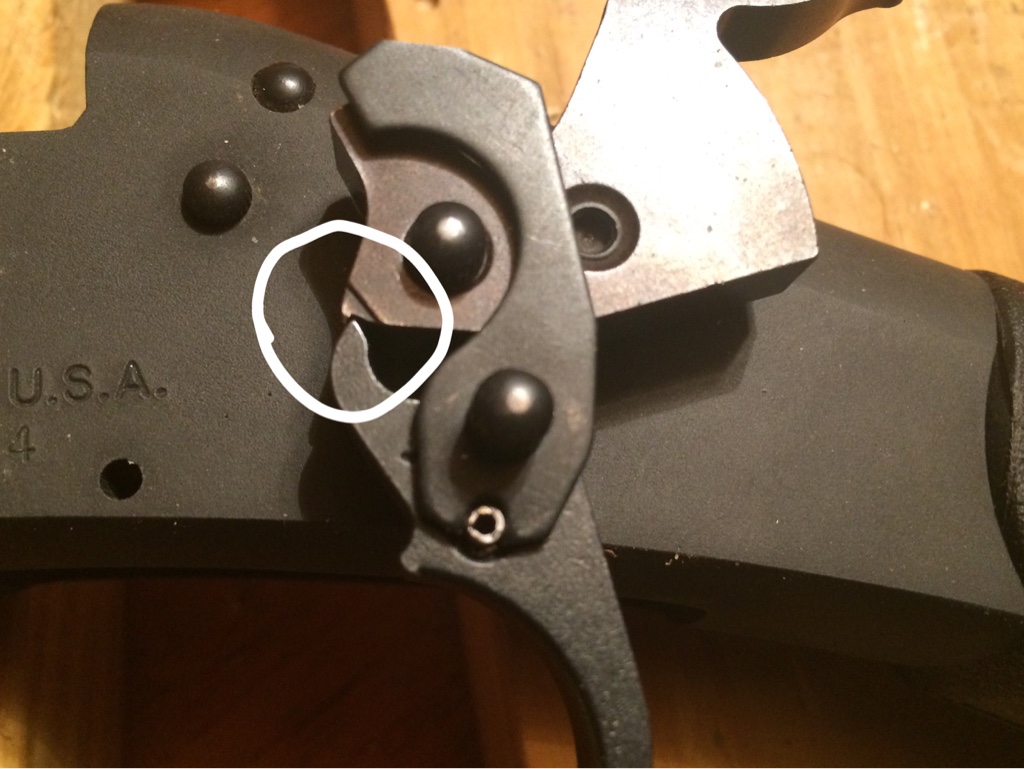
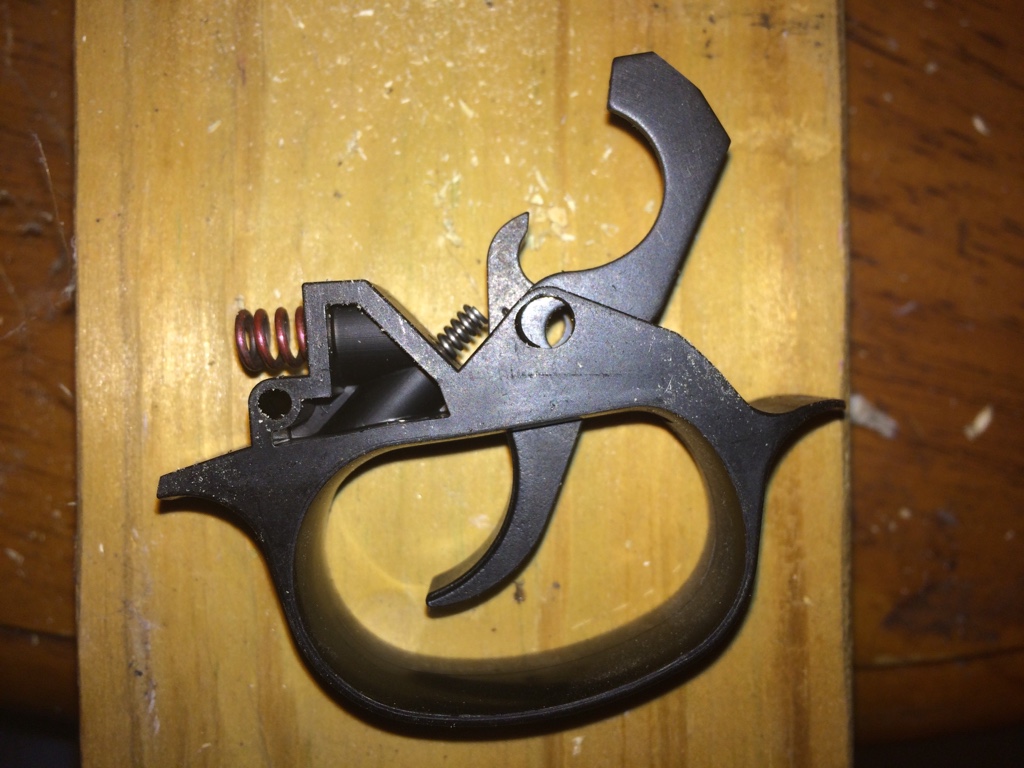
Now go to the smaller pin at the bottom of the frame and remove it. Grip the receiver with one hand so that you are holding the trigger guard in and slowly tap out the larger pin at the bottom. There are two springs in the trigger assemble. the small silver spring is pretty docile, the larger one will try to jump out if you aren't careful. Set the assembly aside.
Look inside the receiver and you will see the hammer spring. Pop it lose from the ledge along the side, it's held by the next pin so it won't go anywhere. Now go to the first pin from the bottom and tap it out about halfway, this will let the hammer spring fall out. Put it somewhere safe and tap the pin the rest of the way out. Pull the hammer back slightly (like you are cocking it) and it should fall loose, a little shaking and it should drop out of the bottom of the receiver.
That's really as far as you need to go to get a pretty good trigger.
(pics to be added)
The online written directions are pretty detailed, they are great, but they also make it look like you need to be a practicing gunsmith to tackle it. I finally got bored enough yesterday to go for it and after completing the job I found it wasn't nearly as bad as the 20 pages of PDF made it look. However, it can very easily be taken too far. The contact surfaces a very small and it makes keeping a proper angle that much more important.
Tools needed: Hammer, punches to fit each pin (i use allen wrenches), phillips screwdriver for the fore stock, something that will work as a slave pin for the larger size pins (i cut a piece off the allen wrench I used for a punch), two 2X4 wood blocks, honing stone, dremel and polishing compound, good eyes, whatever else I remember as I go.
Disassembly:
First thing you need to do is remove the forestock and barrel. Pop the barrel off and throw it somewhere. If you want you can remove the butt you can but it's not necessary. Two #2 Philips in the pad and a 9/16" bolt. You'll need an extension to reach it.
Now time to beat the shit out of it. If you have the 300BO AAC version you got it easy. I thoroughly tested the finish and it's tough as hell. If not, take proper precautions and adjust as needed.
You only need to remove the pins circled in the picture. They are splined on one side so you only want to hit them from the side shown in the picture. My method: Place the receiver on the blocks with them spaced so the pin has clearance to punch down between them. Take the hammer, choose a pin, and whack the **** out of it. I was using my wifes little hammer, if you are using a small sledge just whack the tar out of it. Make sure the 2X4s are spaced close enough to support the area around the pins. They are fairly stubborn. The smooth face hammer left no marring of any kind on the finish. Once each is flush with the receiver you can use a punch without it skipping off the rounded pin. For now, just get them started, don't remove them completely.
Now go to the smaller pin at the bottom of the frame and remove it. Grip the receiver with one hand so that you are holding the trigger guard in and slowly tap out the larger pin at the bottom. There are two springs in the trigger assemble. the small silver spring is pretty docile, the larger one will try to jump out if you aren't careful. Set the assembly aside.
Look inside the receiver and you will see the hammer spring. Pop it lose from the ledge along the side, it's held by the next pin so it won't go anywhere. Now go to the first pin from the bottom and tap it out about halfway, this will let the hammer spring fall out. Put it somewhere safe and tap the pin the rest of the way out. Pull the hammer back slightly (like you are cocking it) and it should fall loose, a little shaking and it should drop out of the bottom of the receiver.
That's really as far as you need to go to get a pretty good trigger.
(pics to be added)

Last edited: