You are using an out of date browser. It may not display this or other websites correctly.
You should upgrade or use an alternative browser.
You should upgrade or use an alternative browser.
Looking for a Meat Cleaver
- Thread starter Hoji
- Start date
The #1 community for Gun Owners in Texas
Member Benefits:
Fewer Ads! Discuss all aspects of firearm ownership Discuss anti-gun legislation Buy, sell, and trade in the classified section Chat with Local gun shops, ranges, trainers & other businesses Discover free outdoor shooting areas View up to date on firearm-related events Share photos & video with other members ...and so much more!
Member Benefits:
General Zod
TGT Addict
General Zod
TGT Addict
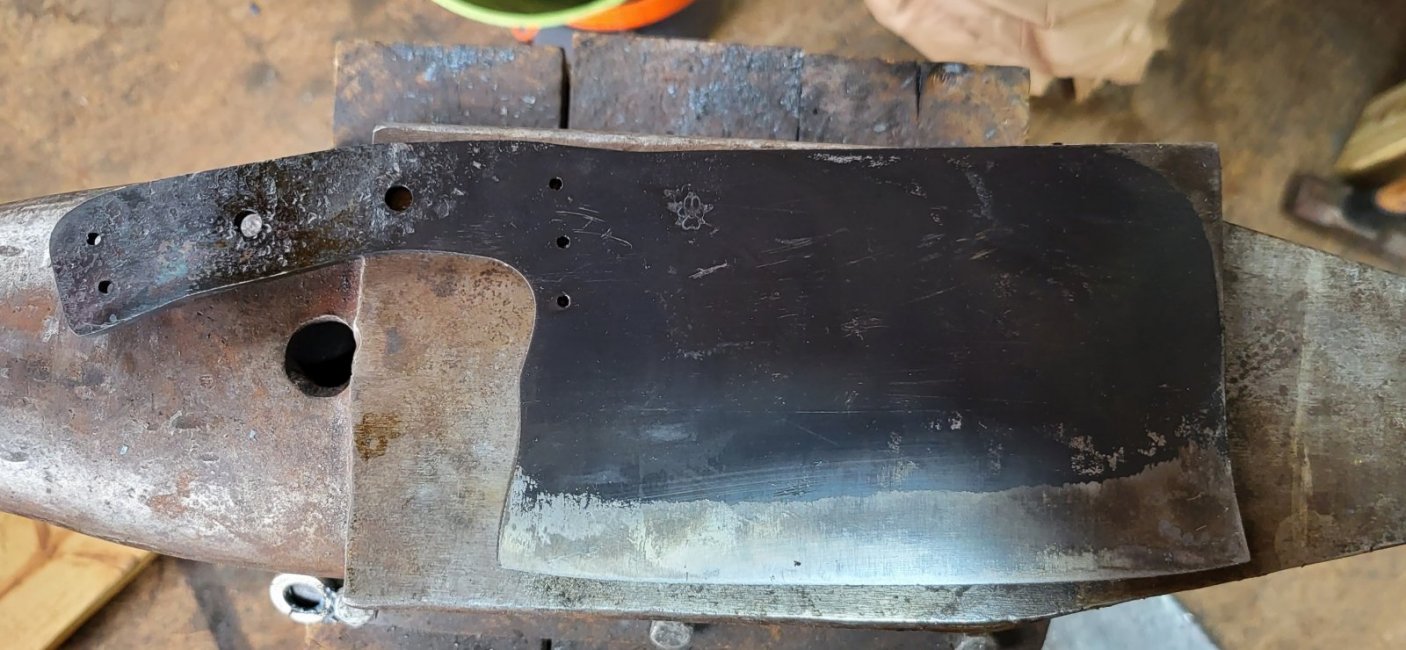
All cleaned up and ready this morning, before I fit the brass pieces. And you can see my greatest frustration, a double image on the touch mark. Dammit.

Just makes it worth that much more.And you can see my greatest frustration, a double image on the touch mark. Dammit.
General Zod
TGT Addict
What do you expect its finished weight to be?
It's hefty. I'm gonna have to find a scale that'll measure more than 12 ounces. I think it's somewhere around a pound. The brass and wood will add some to that.
Don’t think I’ve posted mine, but here it is. It’s a beast, and sharp as a razor. It weighs 3lb 1oz.
Got it at a garage sale for $2 I think.
It was pretty rusty. I cleaned it up and wrapped the handle in paracord. I love this thing.


Got it at a garage sale for $2 I think.
It was pretty rusty. I cleaned it up and wrapped the handle in paracord. I love this thing.
Last edited:
General Zod
TGT Addict
Okay. The current state of the Bonechopper:
The blade is under a protective layer of tape while I deal with handle fitting. The brass pieces are shaped and installed, and I did some grinding, sanding and cleanup tonight. Next step, the walnut handle scales.
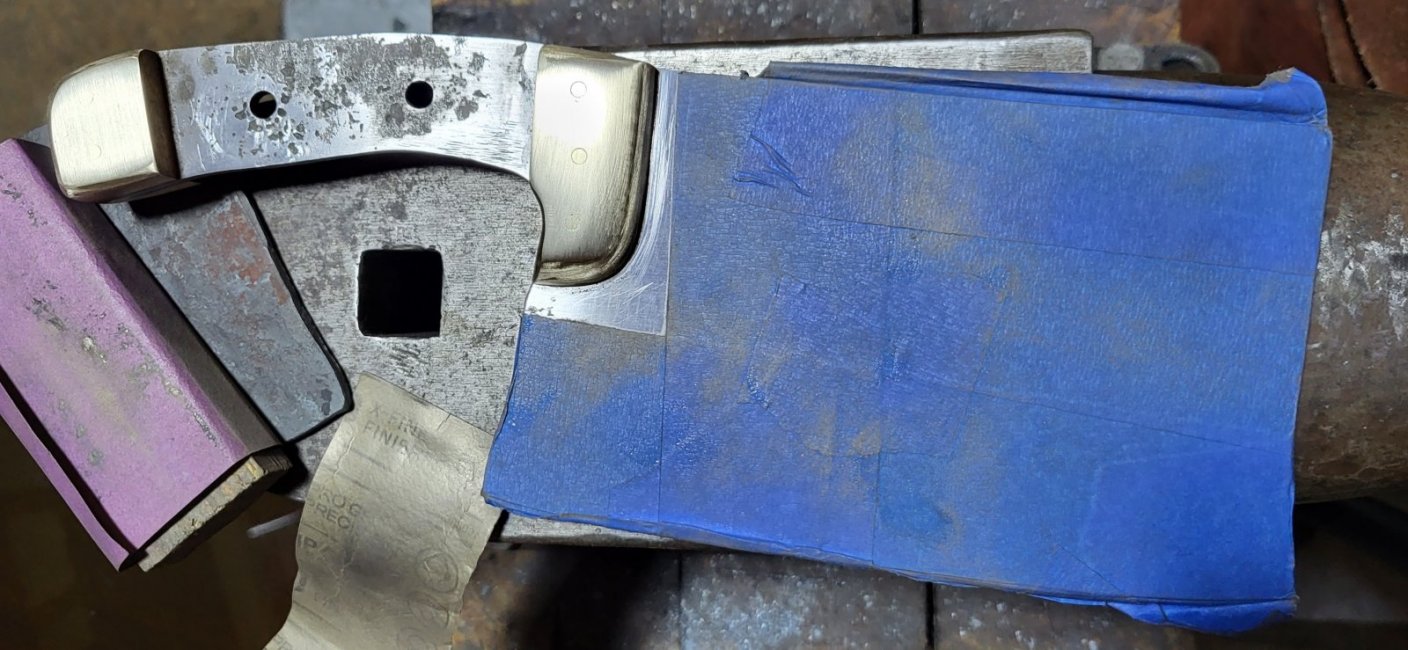
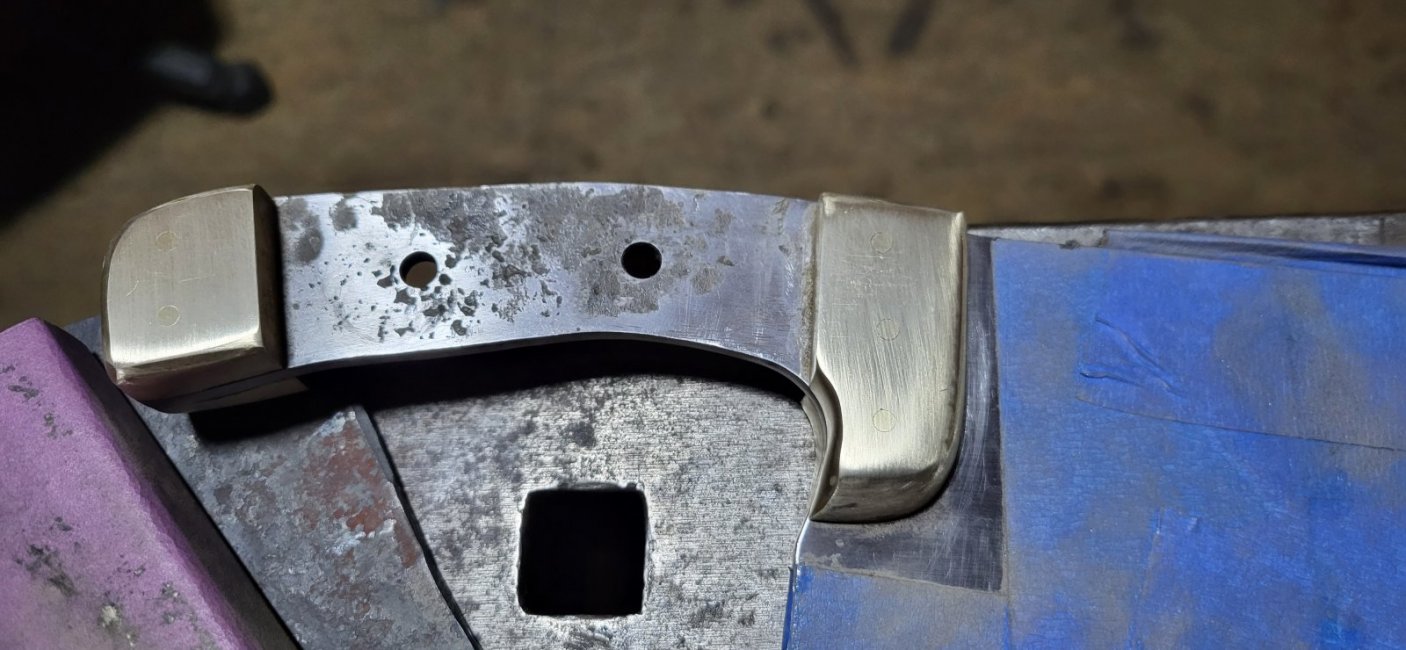
Pictured here with the walnut blanks I'll be using:
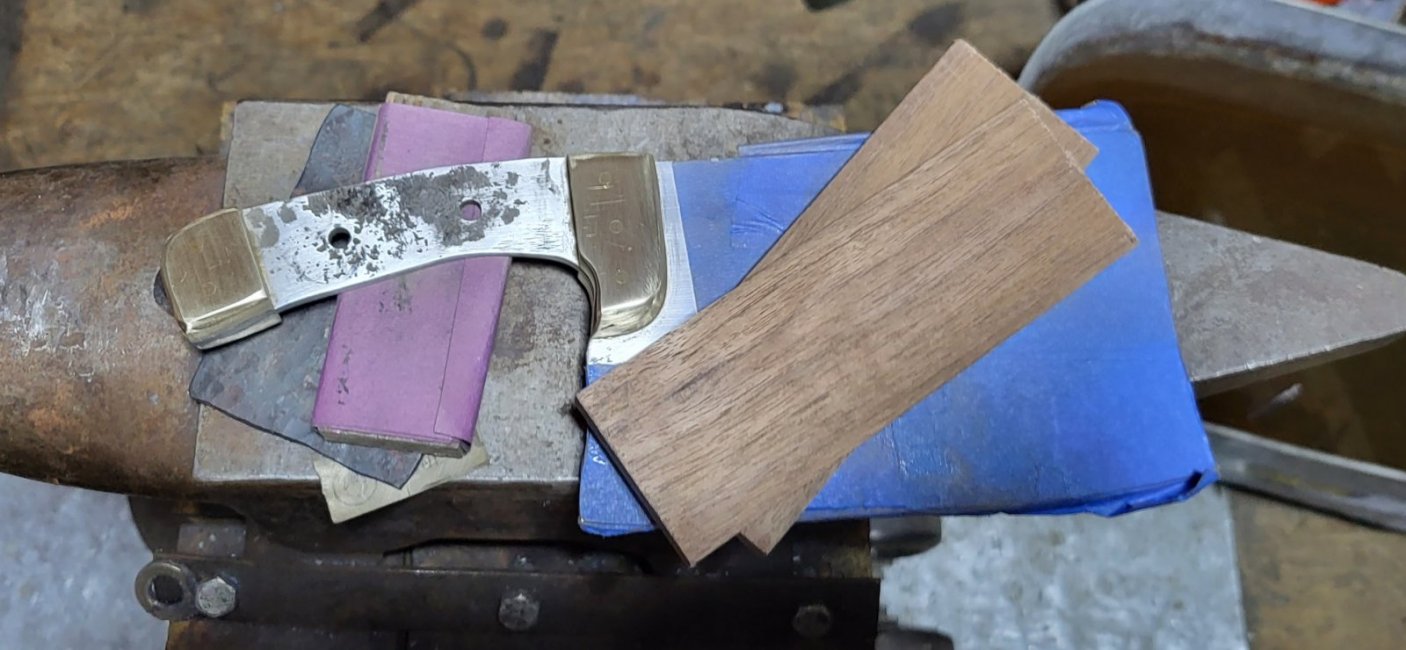
The blade is under a protective layer of tape while I deal with handle fitting. The brass pieces are shaped and installed, and I did some grinding, sanding and cleanup tonight. Next step, the walnut handle scales.


Pictured here with the walnut blanks I'll be using:

General Zod
TGT Addict
Love the brass on there
It's my first time using brass, and I'm pretty pleased with the whole process. So much easier to work than steel hardware.
General Zod
TGT Addict
It's getting interesting now, close to the finish.
A lot happening real quick. Tomorrow the handle scales, and Sunday it'll be sharpened. Maaaaaybe tomorrow, if the epoxy sets well and shaping the handle goes fast.
General Zod
TGT Addict
General Zod
TGT Addict
Ok. Handle fit-up was...interesting. The Bonechopper is still fighting me every step of the way. In my previous knives, parts fit-up went smoothly and I was able to dry-fit the bolsters and scales and pin them in place before grabbing the epoxy and everything went smoothly.
Well, my experience the other night fitting and epoxying the brass bolsters told me I'd be in for a challenge today. Parts that had gone together just fine for rough shaping suddenly didn't go together right for final fitting, and today was no exception.
So once I got the wood roughly cut and in place, I drilled the pin holes so they would line up perfectly when the scales are snugly between the brass guard and pommel pieces. The time came to dry fit and...
Nope. No good. The pins couldn't go through. I sanded the pins and...nope. They'd go through each scale and they'd go through the tang, but not through more than one at a time.
So I lost a couple of hours driving to town to buy 30 minute epoxy, because my usual 5 minute epoxy was going to guarantee a disaster.
When I got home, I cut the handle pins extra long and tapered one end like a sharpened pencil.
Then I mixed the epoxy and slathered it on, slid the handle scales in place and tapped the pins in like nails.
Here's where we are now.
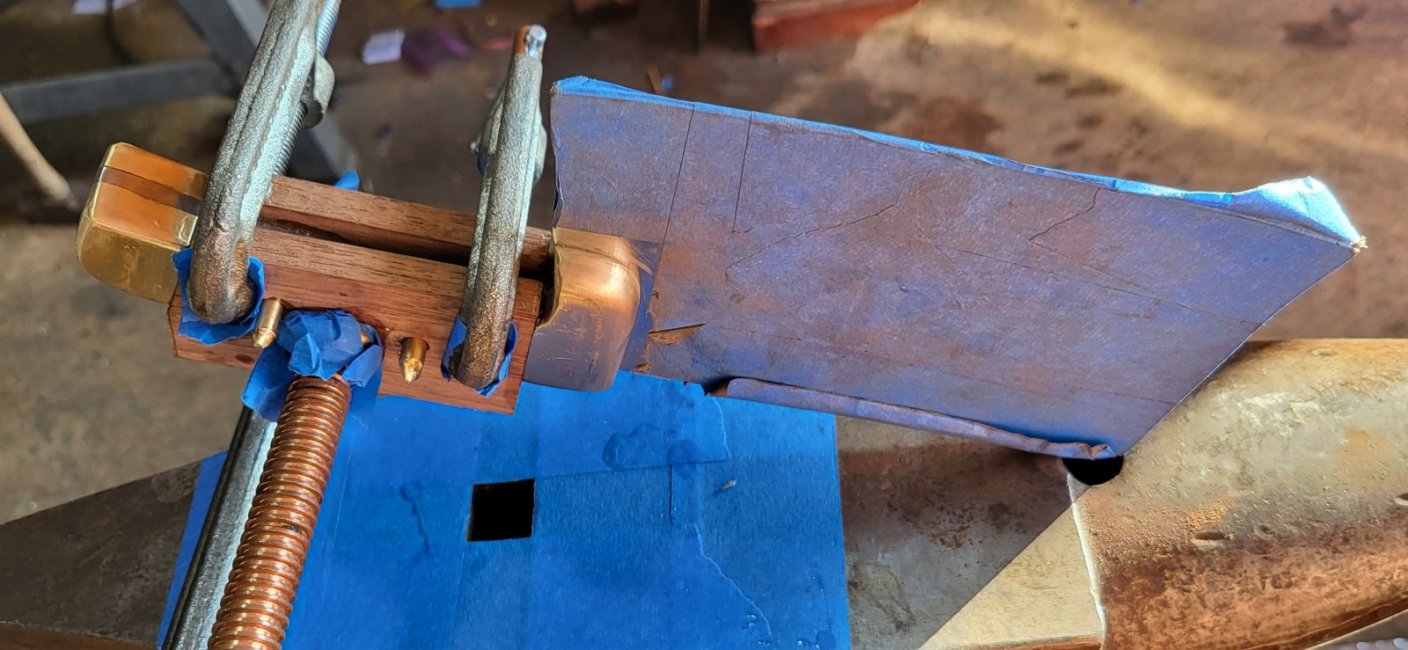
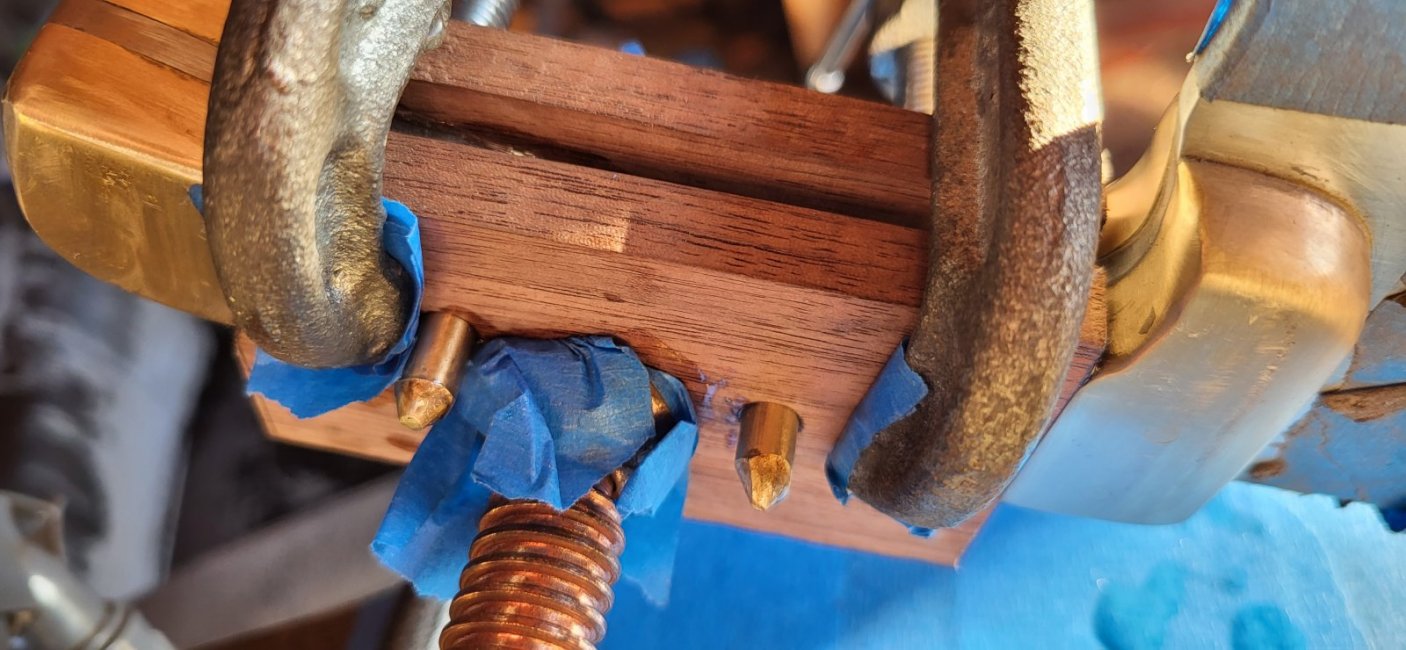
Closeup on the tapered pins
Well, my experience the other night fitting and epoxying the brass bolsters told me I'd be in for a challenge today. Parts that had gone together just fine for rough shaping suddenly didn't go together right for final fitting, and today was no exception.
So once I got the wood roughly cut and in place, I drilled the pin holes so they would line up perfectly when the scales are snugly between the brass guard and pommel pieces. The time came to dry fit and...
Nope. No good. The pins couldn't go through. I sanded the pins and...nope. They'd go through each scale and they'd go through the tang, but not through more than one at a time.
So I lost a couple of hours driving to town to buy 30 minute epoxy, because my usual 5 minute epoxy was going to guarantee a disaster.
When I got home, I cut the handle pins extra long and tapered one end like a sharpened pencil.
Then I mixed the epoxy and slathered it on, slid the handle scales in place and tapped the pins in like nails.
Here's where we are now.


Closeup on the tapered pins
Looking good.Ok. Handle fit-up was...interesting. The Bonechopper is still fighting me every step of the way. In my previous knives, parts fit-up went smoothly and I was able to dry-fit the bolsters and scales and pin them in place before grabbing the epoxy and everything went smoothly.
Well, my experience the other night fitting and epoxying the brass bolsters told me I'd be in for a challenge today. Parts that had gone together just fine for rough shaping suddenly didn't go together right for final fitting, and today was no exception.
So once I got the wood roughly cut and in place, I drilled the pin holes so they would line up perfectly when the scales are snugly between the brass guard and pommel pieces. The time came to dry fit and...
Nope. No good. The pins couldn't go through. I sanded the pins and...nope. They'd go through each scale and they'd go through the tang, but not through more than one at a time.
So I lost a couple of hours driving to town to buy 30 minute epoxy, because my usual 5 minute epoxy was going to guarantee a disaster.
When I got home, I cut the handle pins extra long and tapered one end like a sharpened pencil.
Then I mixed the epoxy and slathered it on, slid the handle scales in place and tapped the pins in like nails.
Here's where we are now.
View attachment 413750
View attachment 413751
Closeup on the tapered pins
Members online
- roadkill
- Txhighlander
- G O B
- MountainGirl
- retiredboomer
- RedRobin
- Otto_Mation
- Txdweeb
- TheSinfulSaint
- mroper
- servis
- Terryr21
- thescoutranch
- TEXAS "All or nothing"
- ZX9RCAM
- runnin2live
- skfullgun
- Shady
- DenverGp
- rl96ss
- jertex
- SIG_Fiend
- ETH77
- brashears9567
- kbaxter60
- Grumps21
- Super Dave
- Darqhelmet
- jetcycles
- Johnny Diamond
- Rhino
- chwoodall
- motorcarman
- tedwitt
- Brains
- Starman213
- D0ntTr3@d0nM3
- Texasgordo
- Mowingmaniac 24/7
- Texas21
- 1911'S 4 Me
- hornetguy
- GMK
- Fishkiller
- NakPPI
- Fullretard
- A.Texas.Yankee
- txaggie91
- Thaskinny1
- General Zod
Total: 990 (members: 95, guests: 895)


